Women are amazing, resilient creatures and this post is to all women...WE ROCK!
Happy Mother's Day!
Now...on to the craft!
My mom had silhouette portraits of my brothers and I done about 10 years ago. I have always been in awe of this art form and wanted to create a silhouette portrait of my daughter. Now, I don't have the art skills to look at someone and draw them, but I am pretty crafty and knew that if I searched around (PINTEREST!) I could definitely find a silhouette idea I could work from.
It didn't take long before I stumbled across an amazing find from Better Homes & Gardens.
So, I quickly got to work creating this portrait of my daughter...
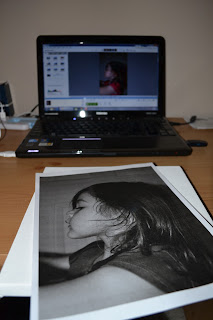
First, I took a profile picture.
Not knowing exactly what I was looking for, I took MANY pictures before I realized that just about any profile shot will work as long as it is just the profile of their face. Once the picture is printed, you can move the photo around on the canvas until it is at the "just right" angle.
Then, I printed out an 8x10 in black and white.
And cut around her sweet little face.
Then I realized that her bangs in the photo would give the sense that her forehead was larger than it actually is, so I trimmed off the edge of her bangs in the photograph.
In pencil I traced around the edge of her photo onto a 10x10 canvas.
Here are my painting materials. I used an acrylic paint.
First, I painted an outline using an angled brush.
Then, I painted the outside of her silhouette with a 3/4" wide brush.
I created the look of her hair by drawing pieces of hair with painted space between each section. I used a smaller, 1/4" brush for this detail work.
It's starting to come together!
I finished the project by painting the edges of the canvas.
Overall, I used 3 coats of paint on the whole project.
And here is the finished project on my fireplace mantle!
I love the way it turned out!
I love it so much, in fact, that I decided to make 2 more canvas silhouette prints of Lilian on 8x8 canvas for my mom and mother-in-law for Mother's Day!
AND...here is the C.R.A.Z.Y. part....
I helped all 25 (yes, twenty-five) of my second graders make one for their own moms for Mother's Day!!! I followed all of the steps described above...just on a much larger scale! I purchased the canvases at JoAnn Fabric and Michaels. I used 8x10 and 10x10 size. I do not recommend using 8x8 size for 2nd graders. Their heads are just too big for 8x8 size canvas when you're using an 8x10 picture. So, depending on the age of the child, you will need to adjust the size of the photo and the size of the canvas.
It took about 2 weeks of slowly working on this project with my students. For the most part, they did very well. I did do a lot of the work upfront to help them complete the project to perfection. For example, I traced their photo in pencil onto the canvas and painted the initial outline for them. They painted the rest of the front of the canvas and the edges of the canvas on their own.
As with everything, the kids who took their time, were patient, and followed directions had BEAUTIFUL projects! And...those kids who are not as neat have a cute project to take home, too...it just could be a little cuter:)
AND...if a student (or you!) makes a mistake, the canvas is WASHABLE. I just put a little water on a paper towel and dabbed at any paint that strayed onto the child's face on the canvas. It was easier to remove when the paint was wet.
Here are how a few of my students' silhouettes turned out...
The project and the artist.
(used with parent permission)
My students also made self-portraits in art. We used these as wrapping paper!
We folded the sides of the self-portrait around the painting, put the Mother's Day card on top, and secured the whole package with a ribbon. CUTE!
And a few more...
I just loved this little card;) This little boy tries so hard and he is at his best when he's creating something. He took great pride in this Mother's Day project!
Is your heart melting?
If you decide to tackle this project in your classroom, give yourself plenty of time. If I do it again next year, I will definitely give myself more than 2 weeks from start to finish.
If you chose to do this project with your own little one, the sky is the limit! I think I have found THE GIFT I will be giving people for years to come!
So, if you're reading this, and we're related or friends...know that a silhouette painting will be coming your way in the future!
HAPPY MOTHER'S DAY!!!
~Nichole
smile:)


